Having started with WordPress, it will be quite difficult to understand the things. I know how all options look when you’re a beginner, and you don’t have any idea how to fix and set things. It took much time to understand WordPress for me, but I thought I should help
So there are three ways to add plugins to your hosted WordPress blog.
1. Add Plugins From WordPress Dashboard
You can add plugins directly from the dashboard. All you need is to know the name of the plugin which you want to install. So we are picking a plugin named ShareThis. Well, this plugin helps your users to share the posts on Social Media sites.
First all, you need to open your WordPress dashboard/admin panel which is located in yoursite.com/wp-admin.php
After that, get that slider come out, you will see many options there. Take a look at below screenshot
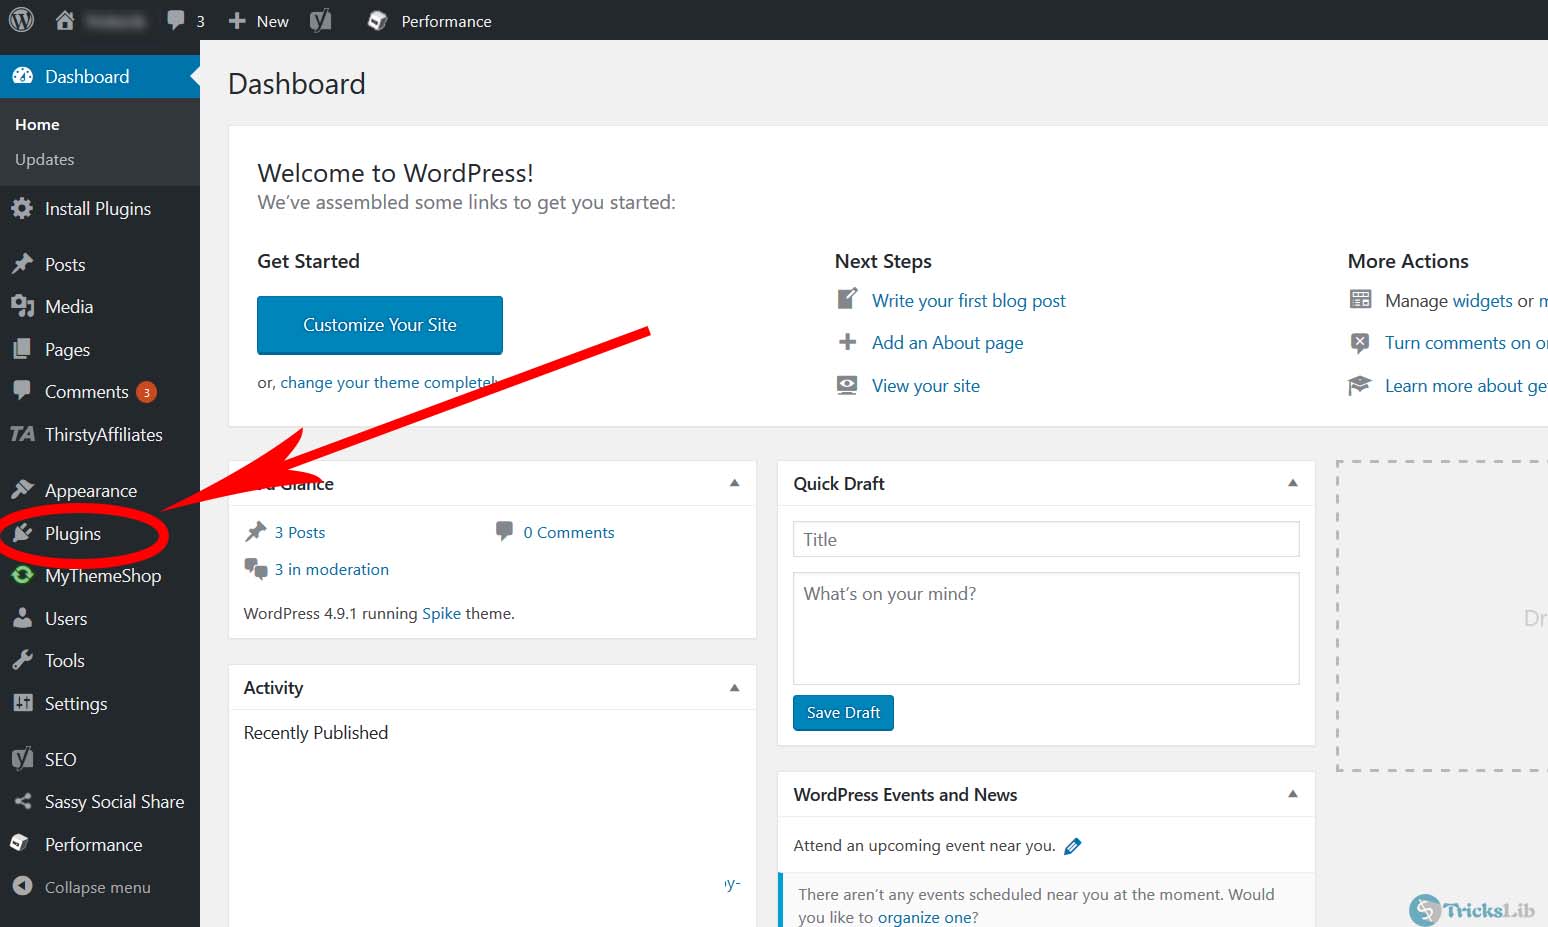
As highlighted in this, click on ‘Plugins’ link. A small drop-down will appear, click on ‘Add New’ to go on.
After that, you will see the page like below screenshot, there will be the grid of many popular plugins, but we wanted to install ShareThis plugin, which is not on the grid. So, there will be a search bar in the right corner as highlighted in below picture.
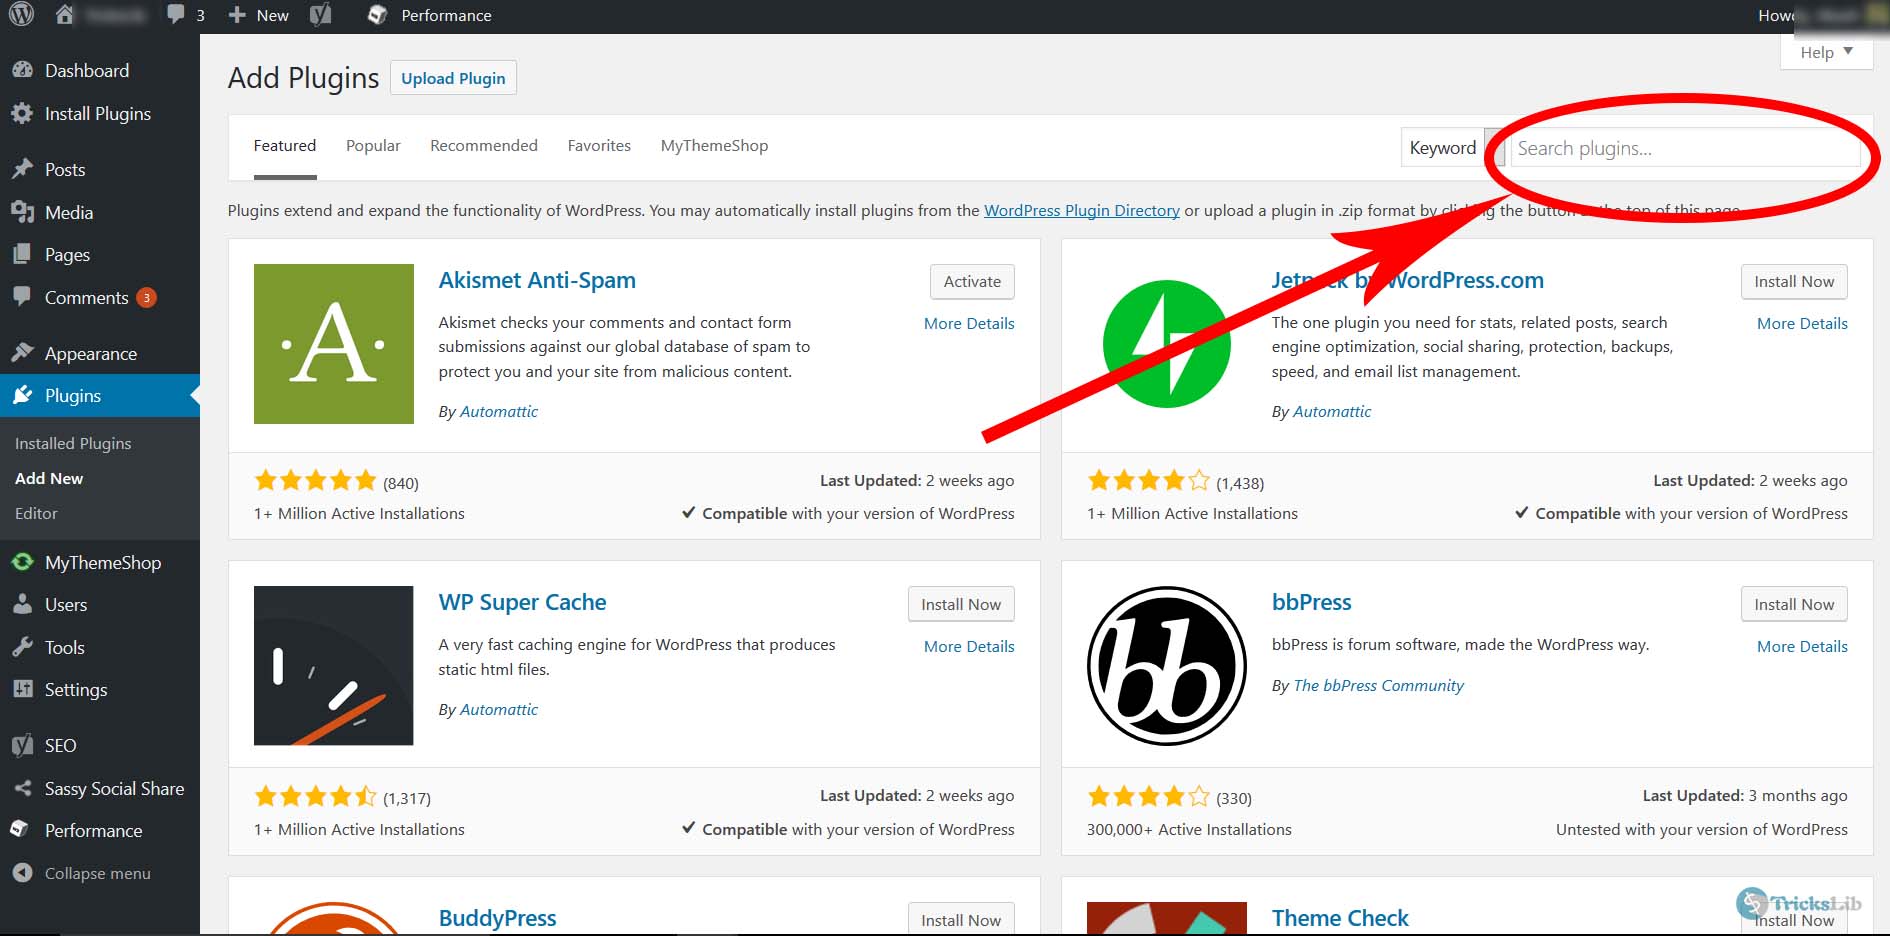
Write plugin name there, and we have selected ShareThis so write this name and search.
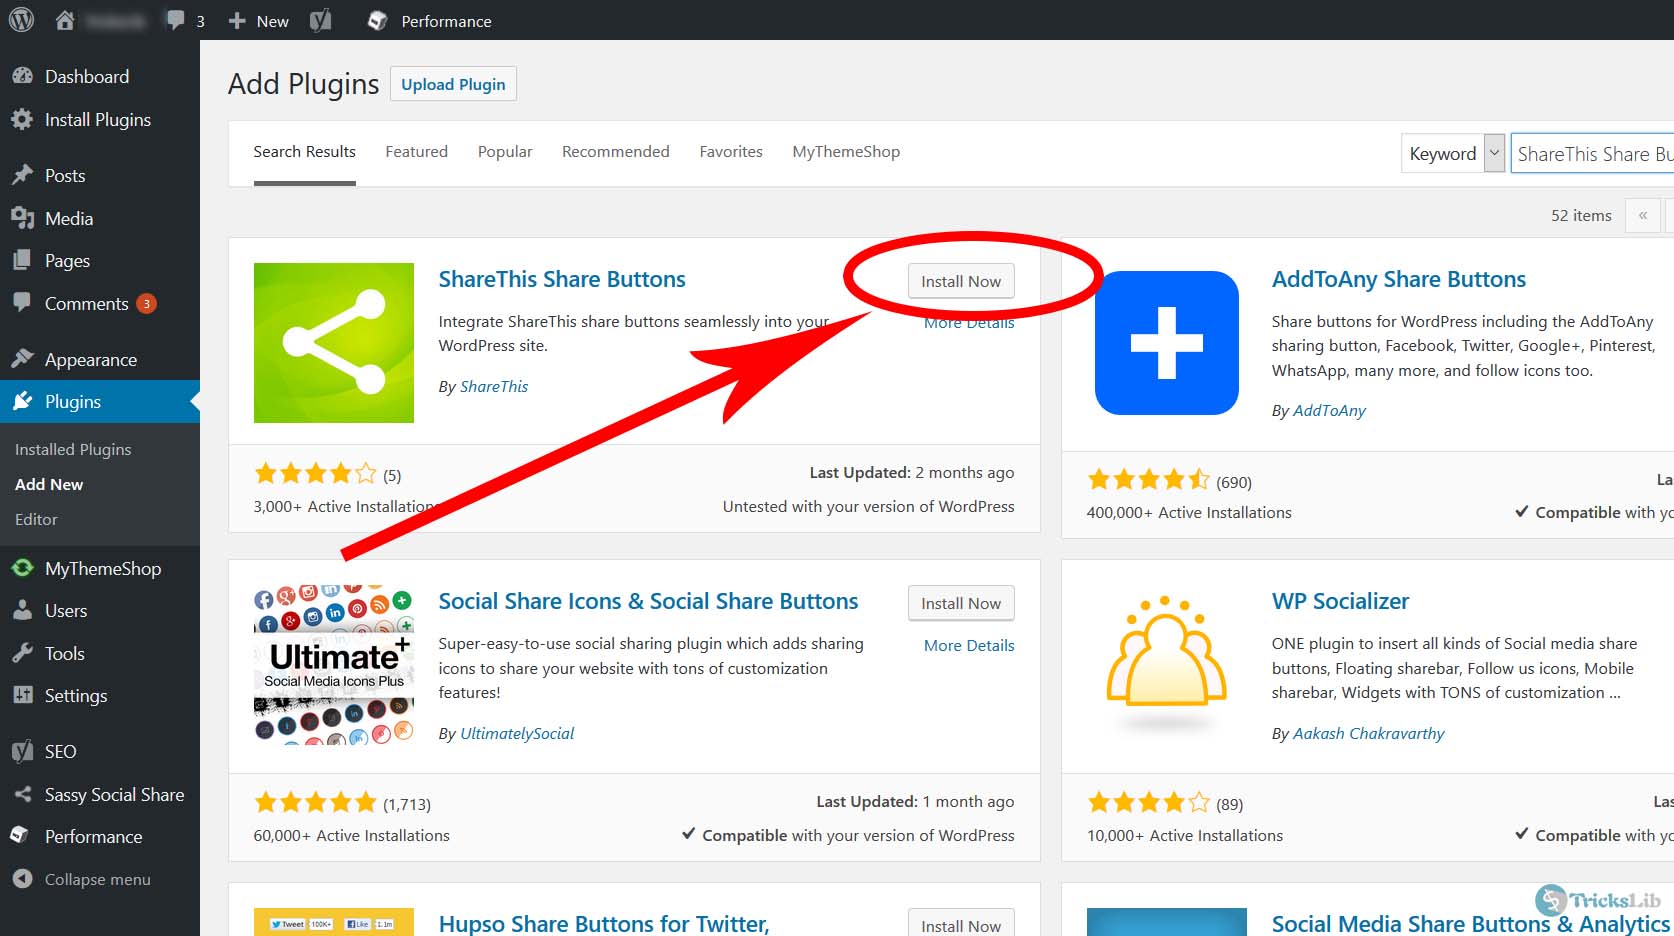
As above screenshot, the plugin is ranked in first place. Click on the Install Now button. It may take time. In this case, it won’t take more than 30 seconds.
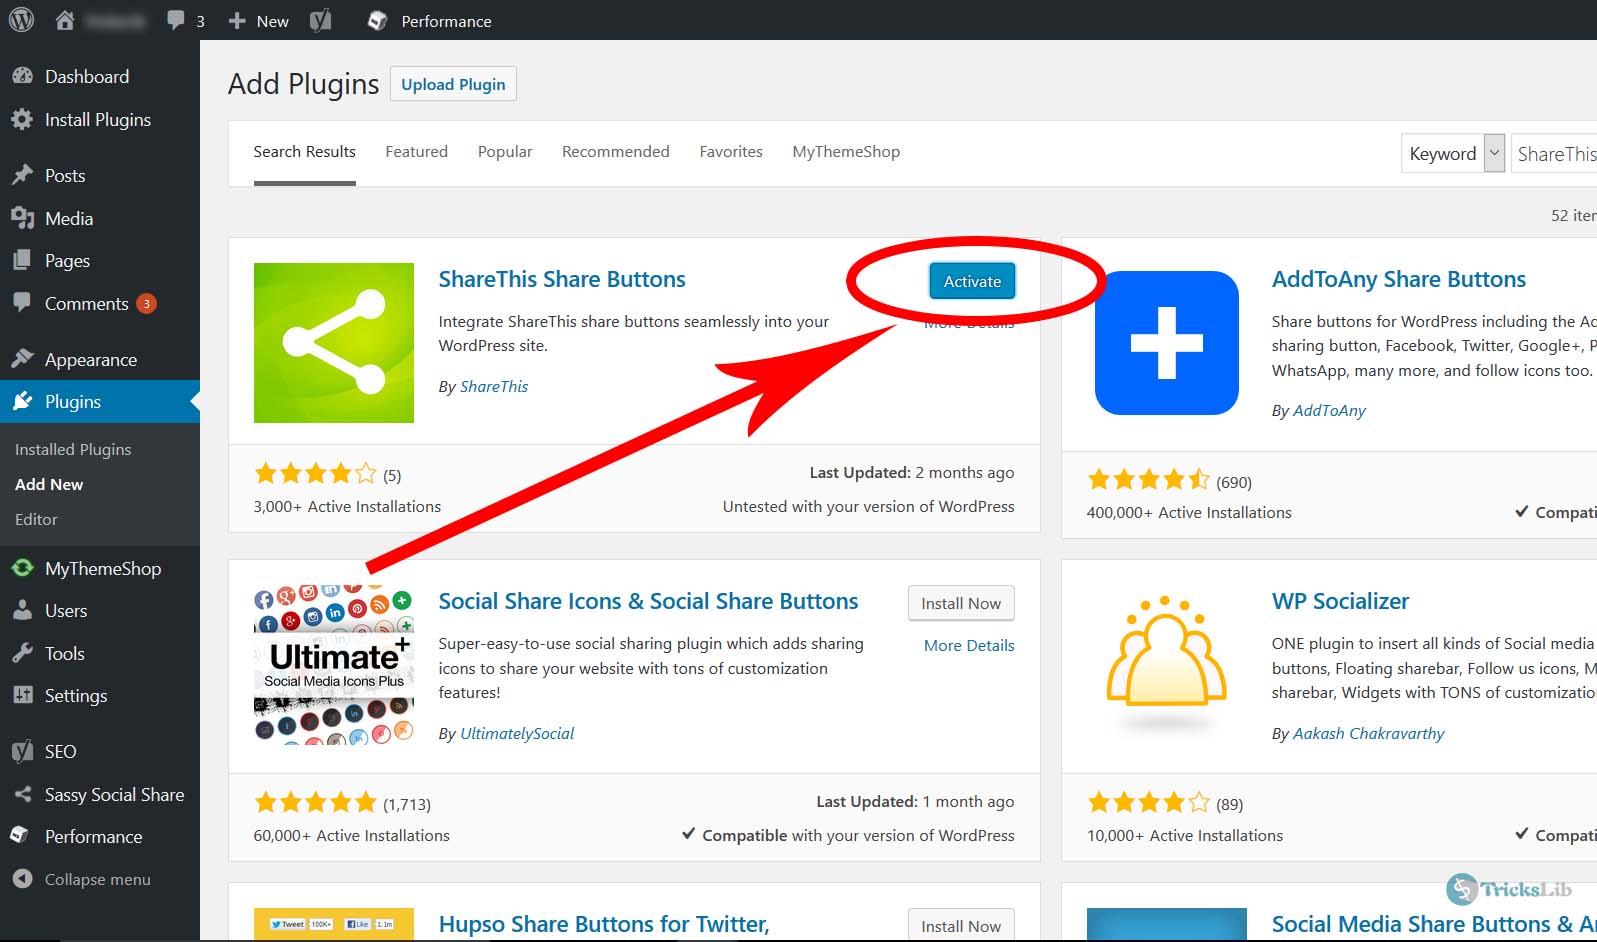
Later, you will be redirected to the same page, but no, you will find an ‘Activate’ button instead of Install now, click on it.
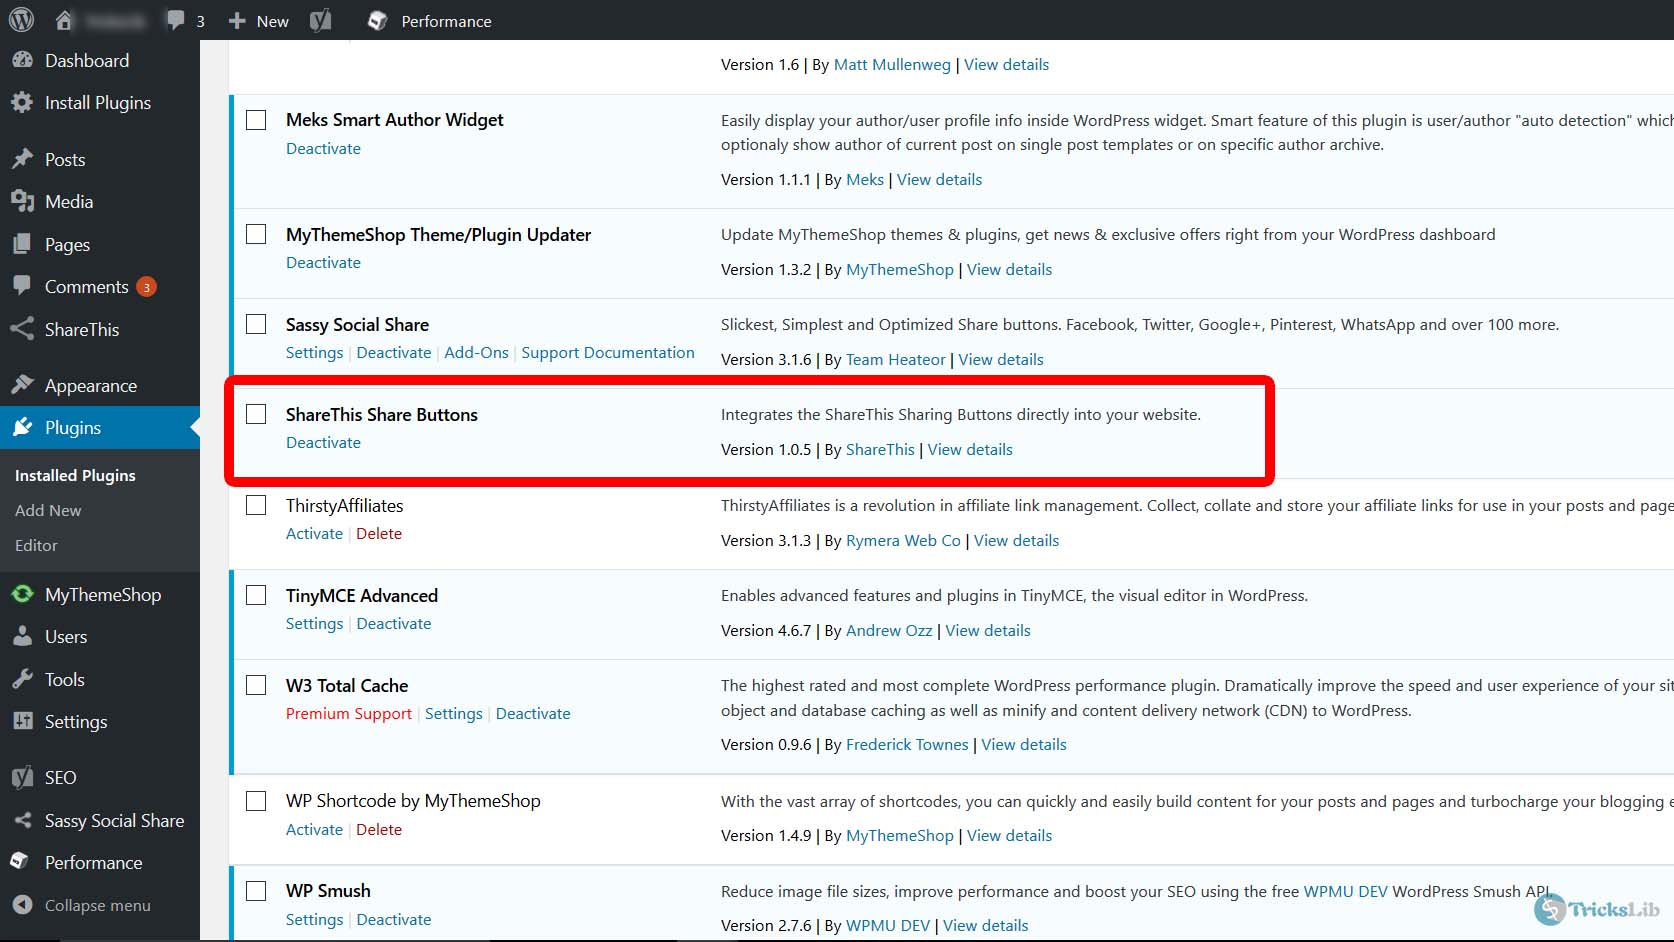
And now you’re done! You’ve successfully installed the plugin using your dashboard
2. Install Plugin With FTP
This method is for them who have knowledge of server and basics of web programming.
Note that you will need zip file of the plugin which is available on WordPress’s plugins library.
So, open FTP and go to wp-content/plugins folder.
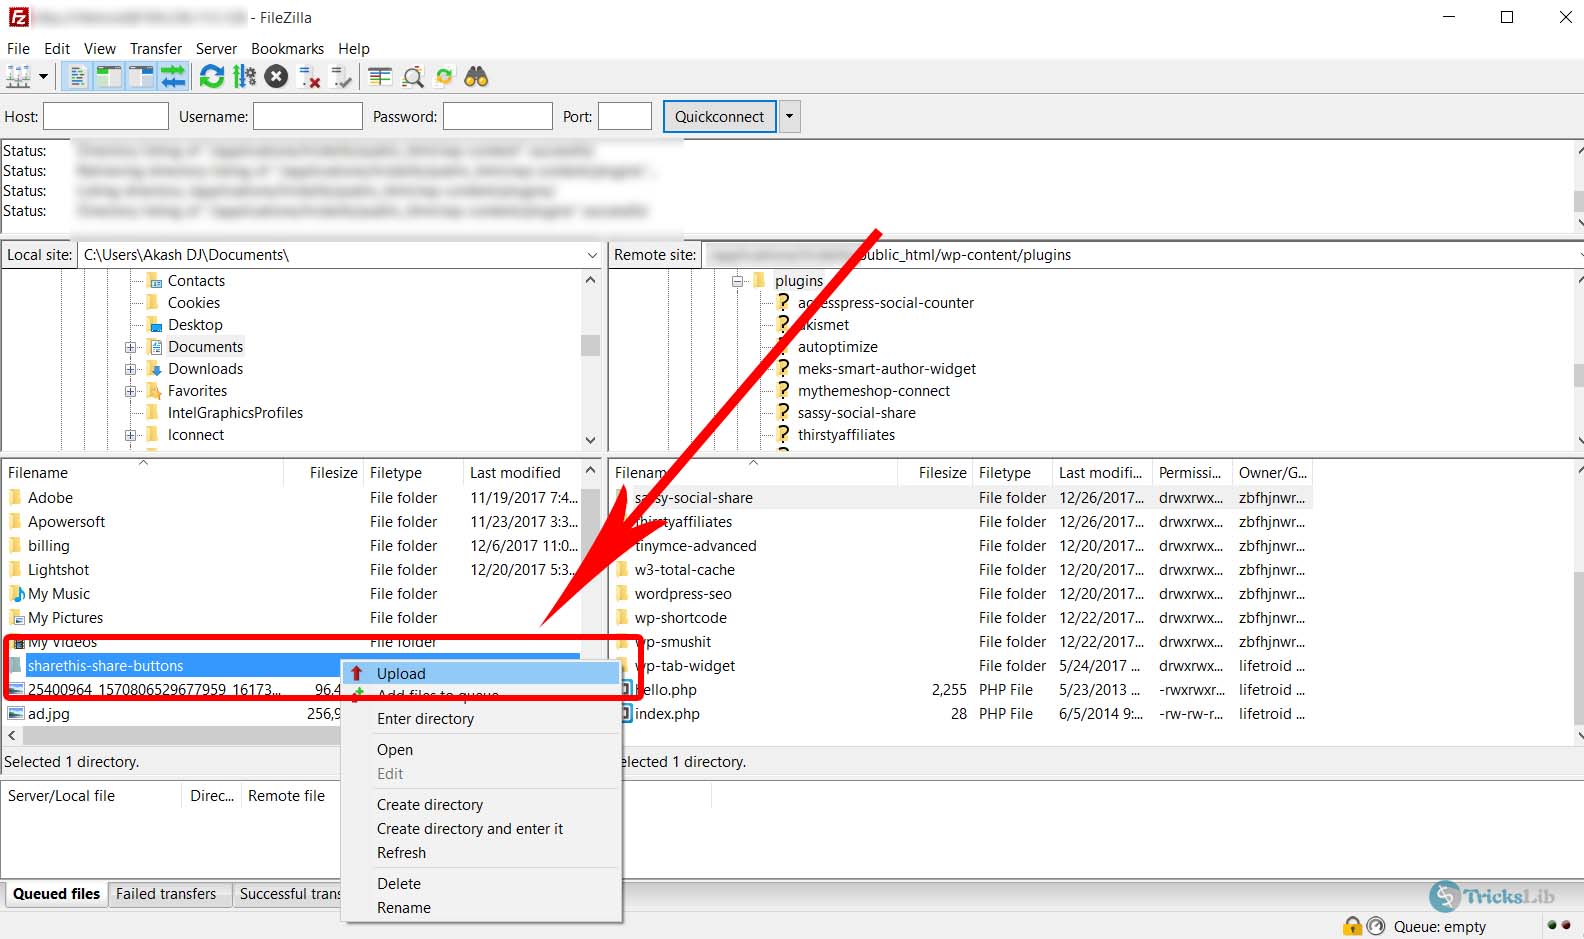
Then select the zip file of the plugin from your device and upload it to your blog.
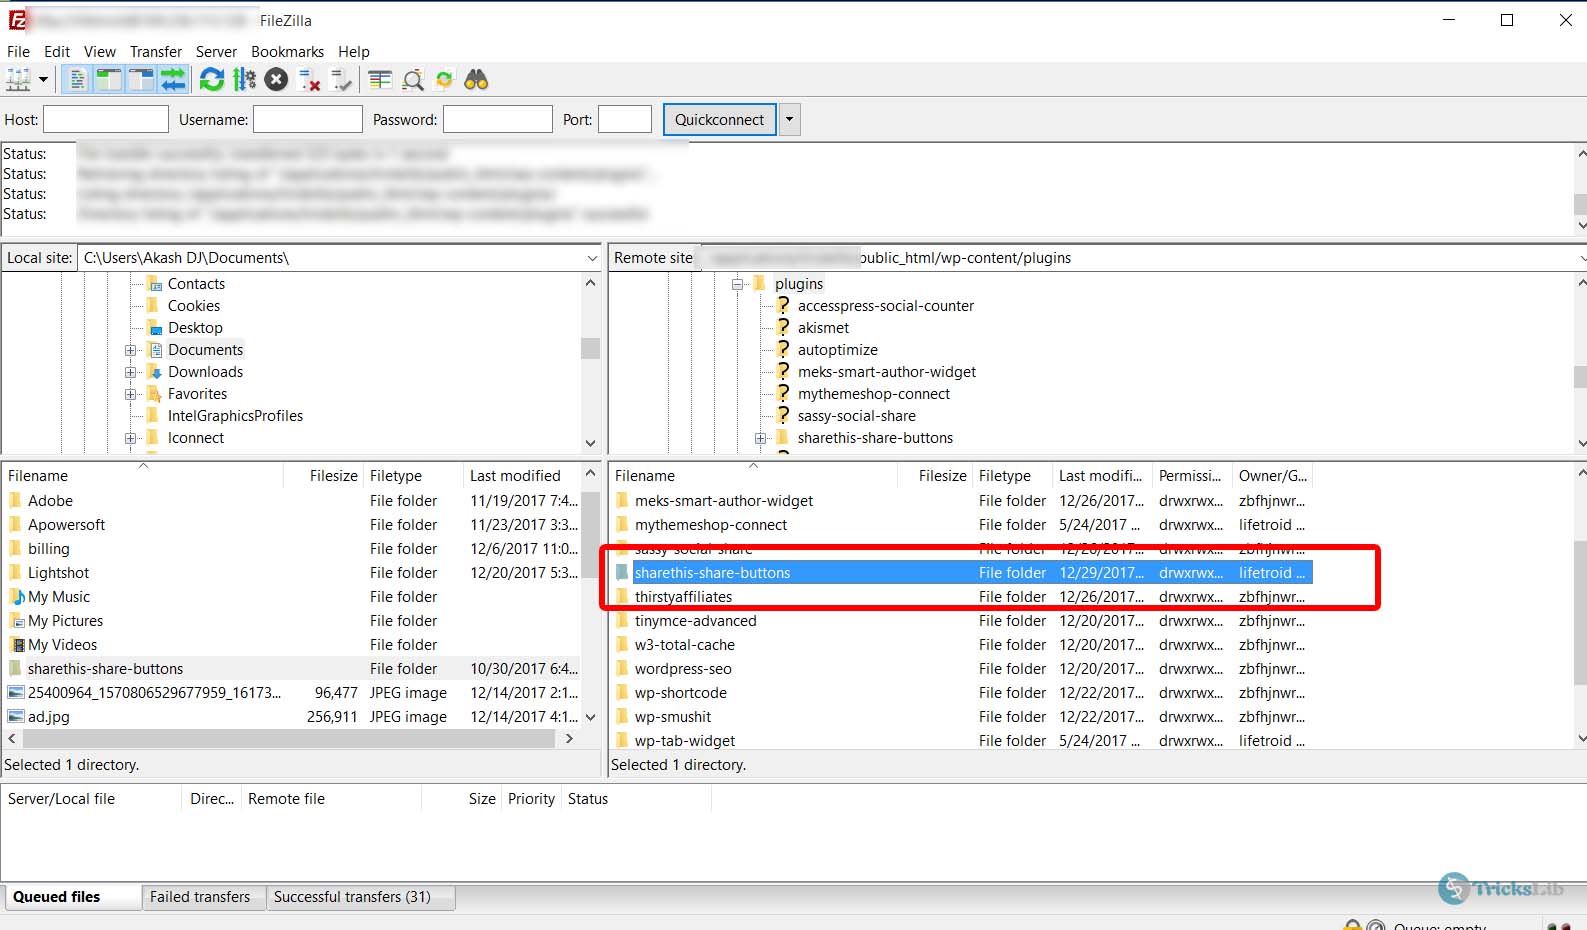
After that, unzip that file. In many FTP services, zip files automatically unzip. Then you will see a folder named plugin. You’re done here.
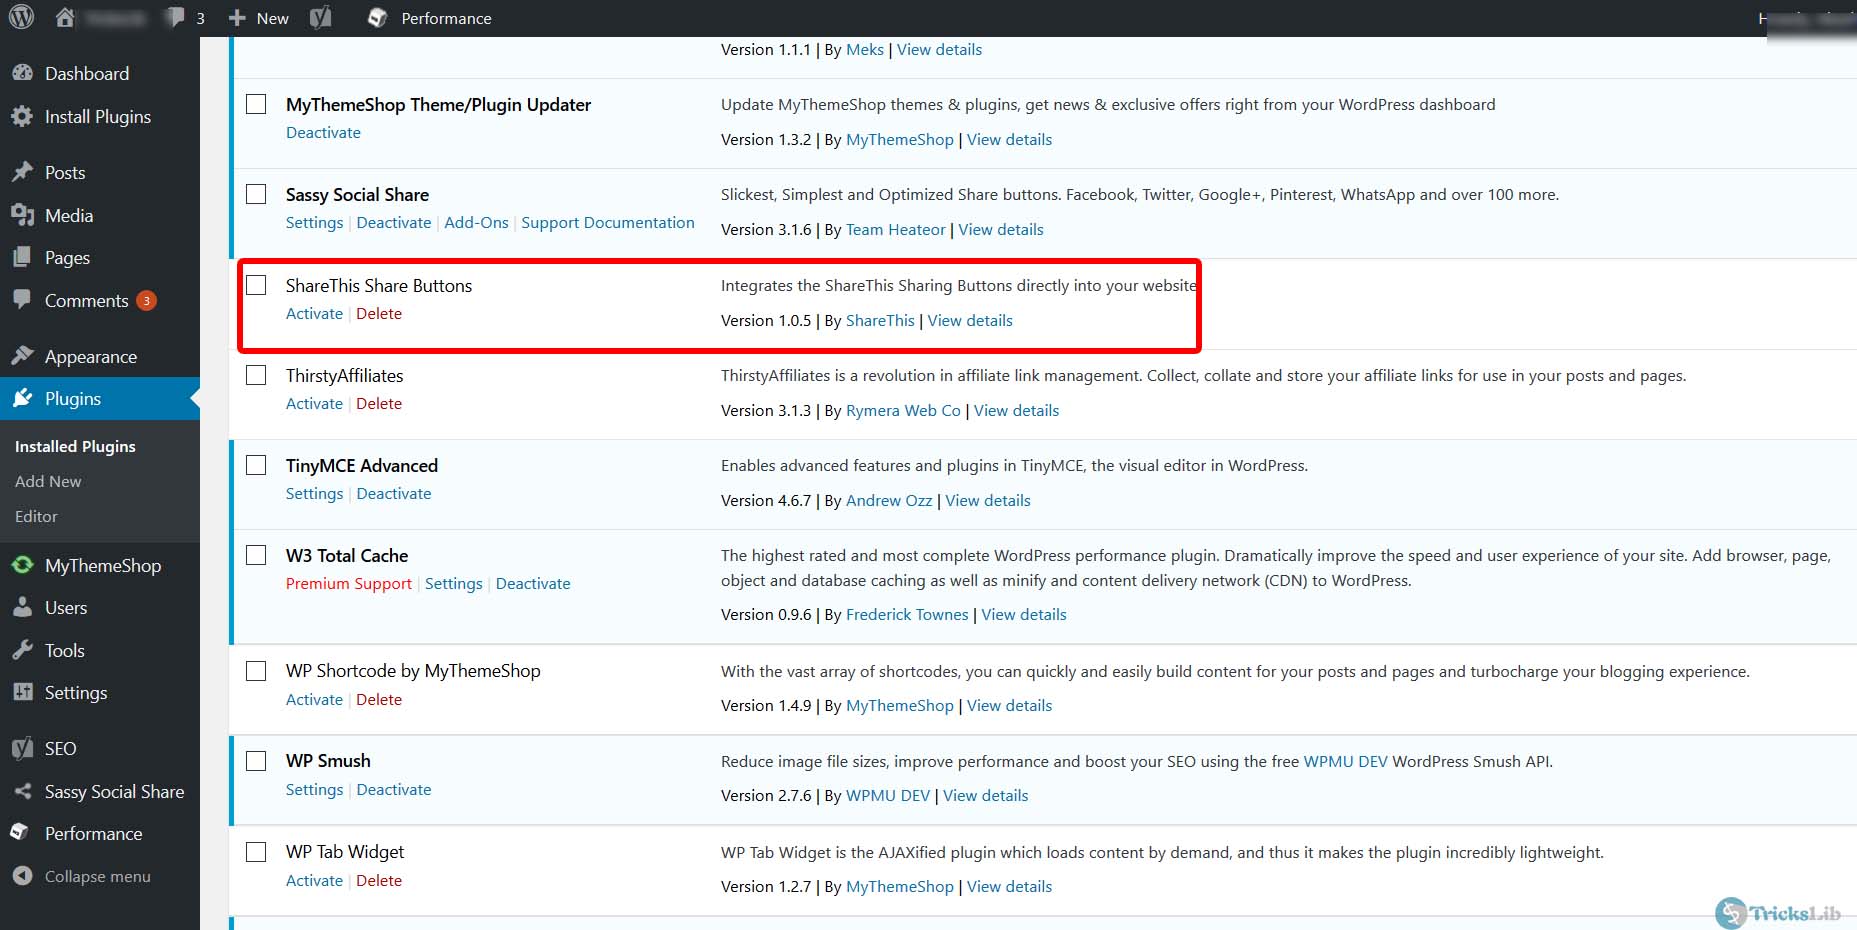
Then, open your WordPress dashboard, then click on Plugins then Installed Plugins. The plugin you’ve uploaded will be shown here. Now, your plugin is uploaded but not activated. Click on Activate to activate the plugin.
Now, let’s move to the third method.
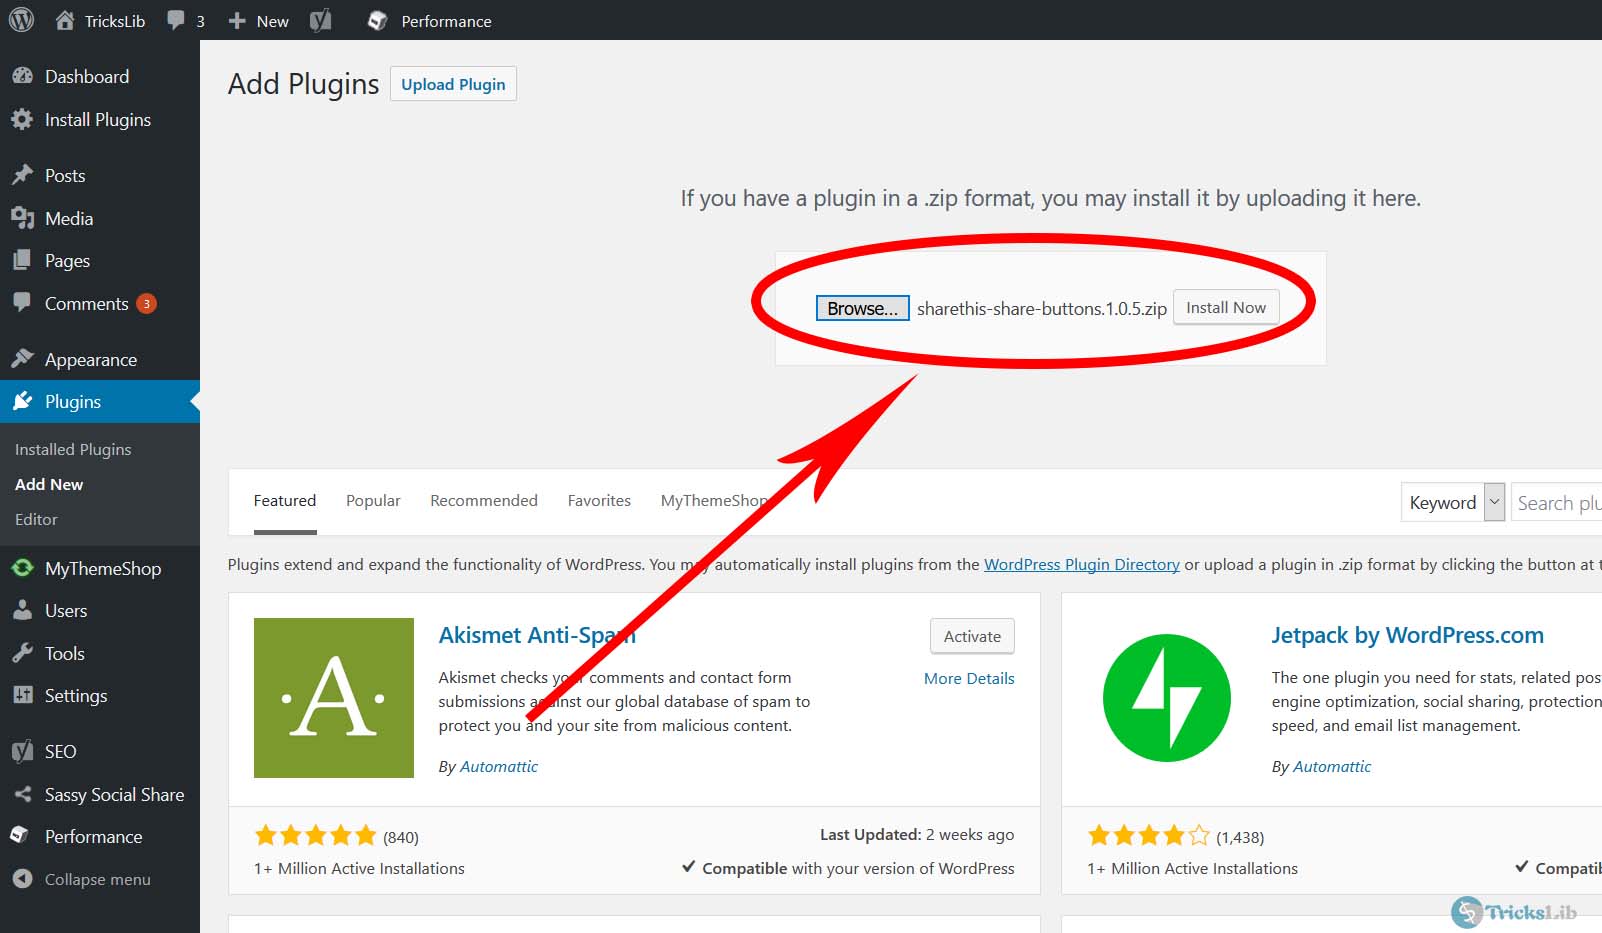
3. Upload And Install Plugin From Dashboard
Again, you need to have already the zip file in the plugin.
Open your dashboard click on Plugins then Add New.
You will see a screen like the below screenshot, as highlighted in below picture, click on it to browse and select your zip file.
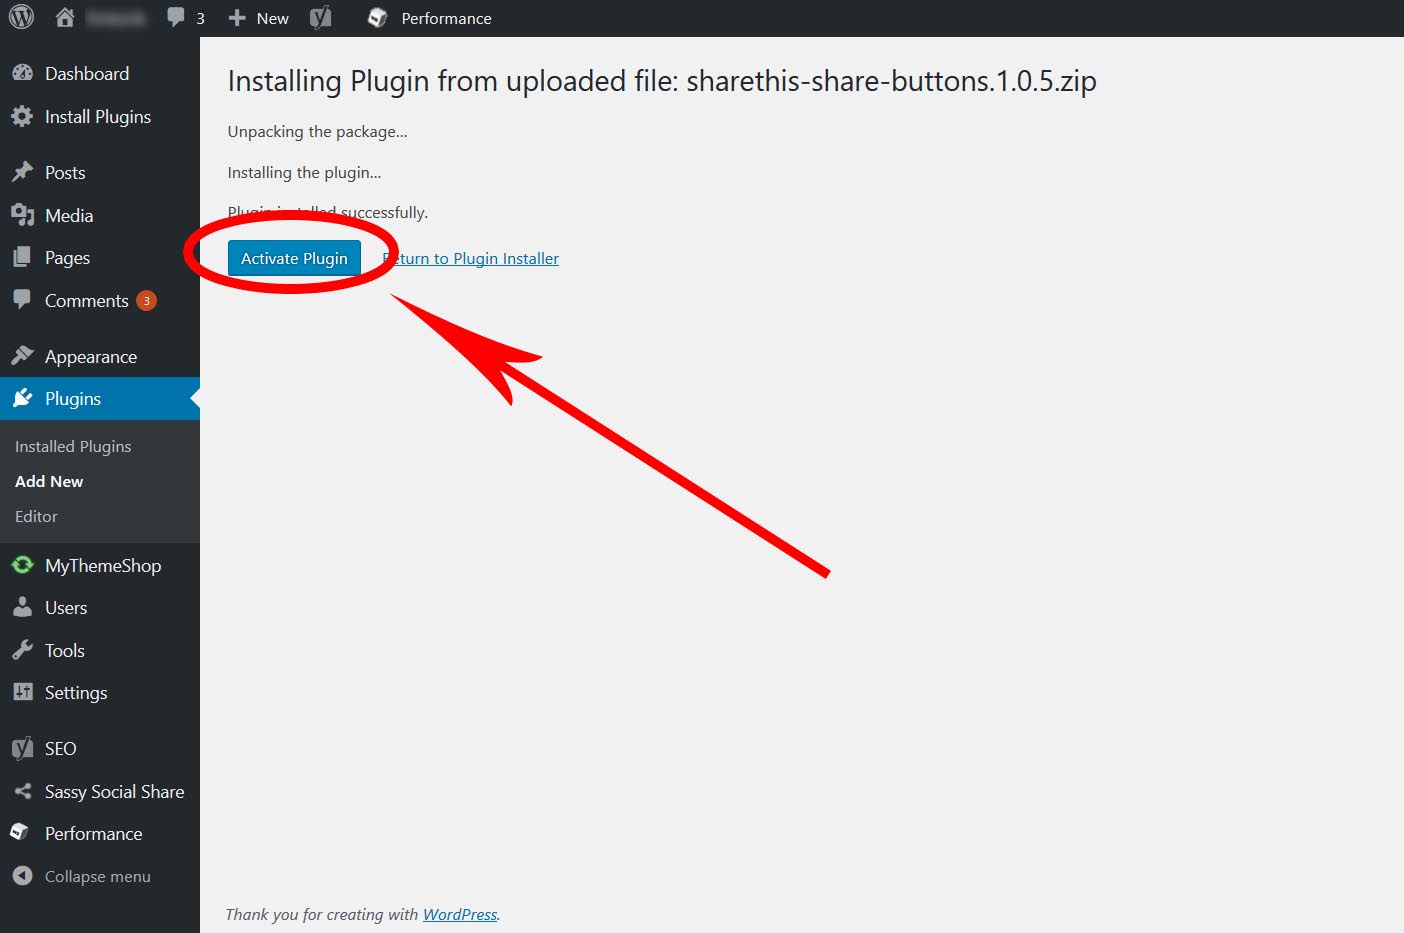
After it uploads, a page like below screenshot will appear, click on Activate to activate the plugin.
Then you will some text note with the green border as in below picture.
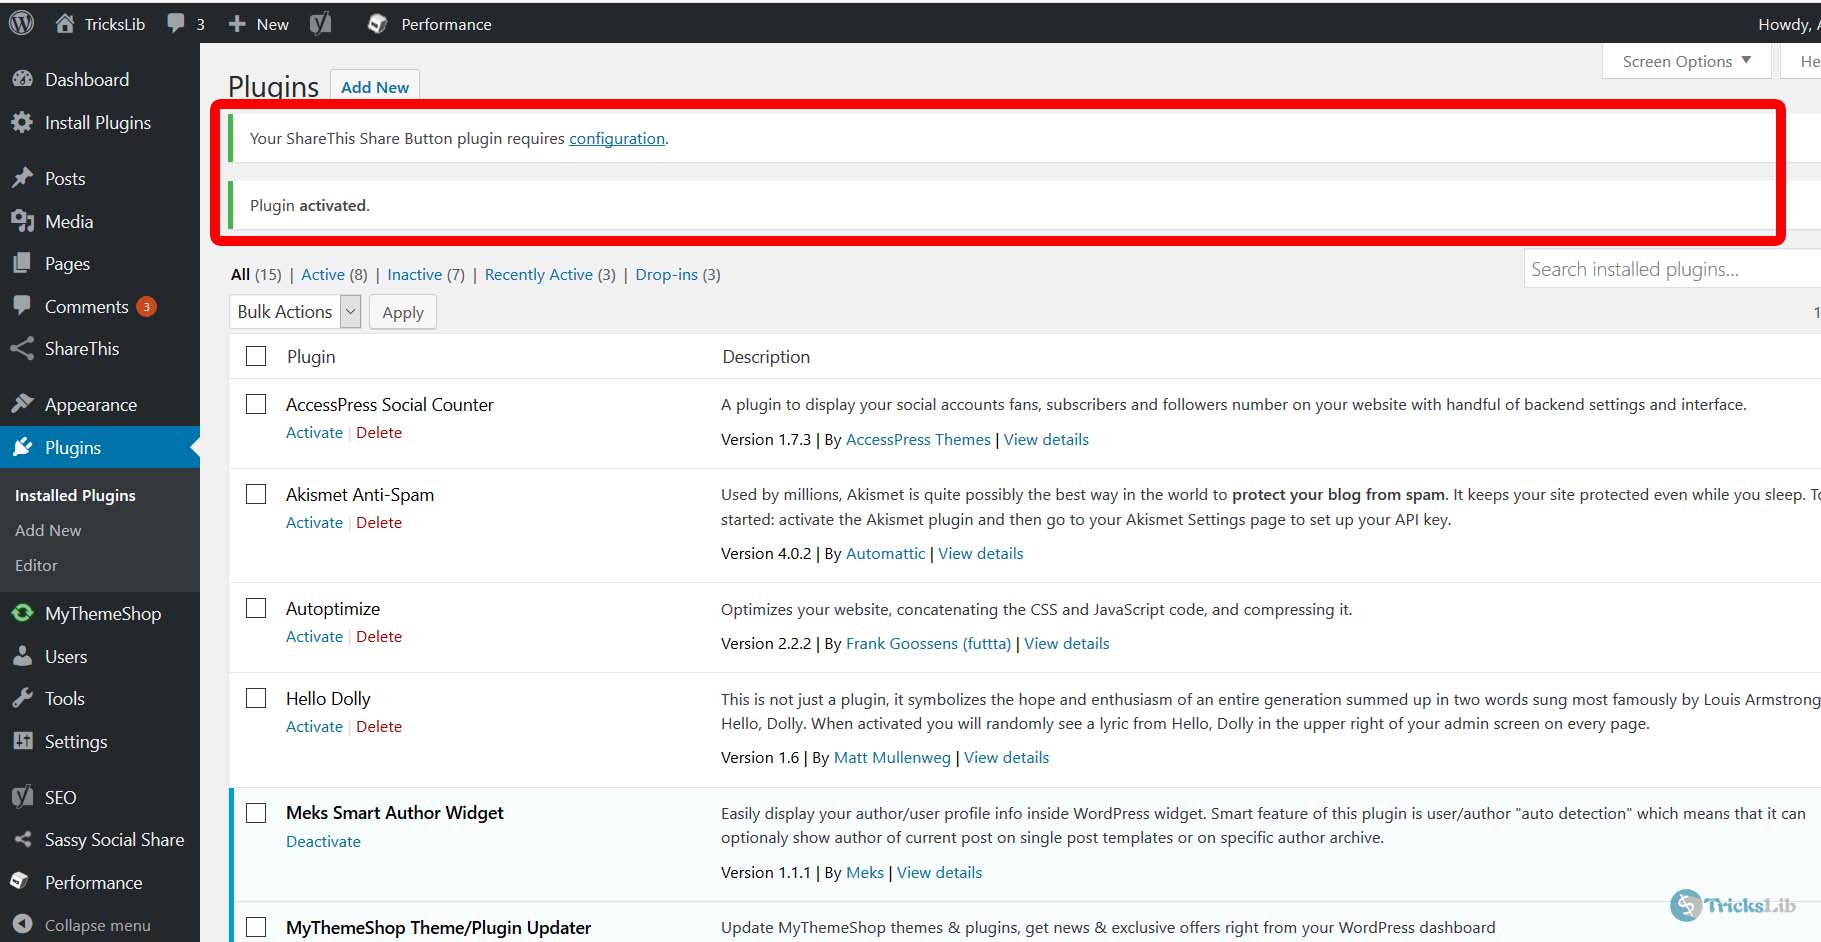
This means the plugin you uploaded & activated is installed successfully.
So these were the three methods to upload, and I tried to explain all methods step by step. I hope you understood it. But in case you have any doubts related to this, feel free to ask in comment box. I will try to reply.