Starting a Self Hosted WordPress Blog is like entering a new world without having any information about it when you’re not programmer/developer.
Because I had experience of coding with programming languages, It’s not even a task for me while for a non-geek, it’s definitely difficult but you won’t feel this difficult if you follow this detailed tutorial.
While choosing the hosting for WordPress, do not go anywhere instead of Bluehost because Bluehost is officially suggested by WordPress. Even we too suggest.
There are some reasons why we suggest Bluehost
- It gives you unlimited bandwidth and unlimited storage.
- 24/7 live chat support
- Free Domain for a year
- Old and reputed hosting service
- Three layers of anti-spam protection
- Excellent security features
Purchasing a Web Hosting
 Let’s start the tutorial. Open this Bluehost link[Use this Link] in new tab/window. The page will appear as like the below screenshot.
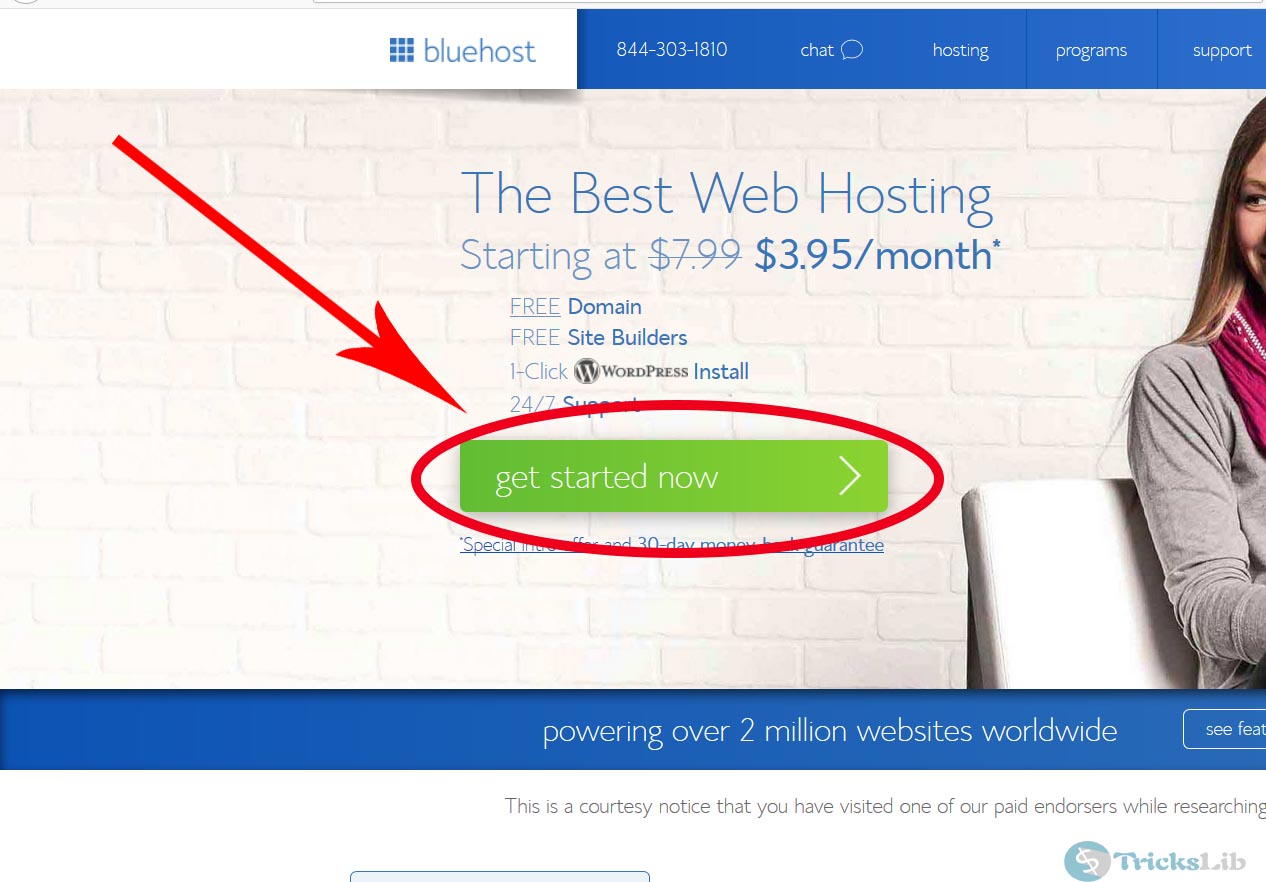
As highlighted in this picture, click on ‘Get Started Now’ button to start the process.
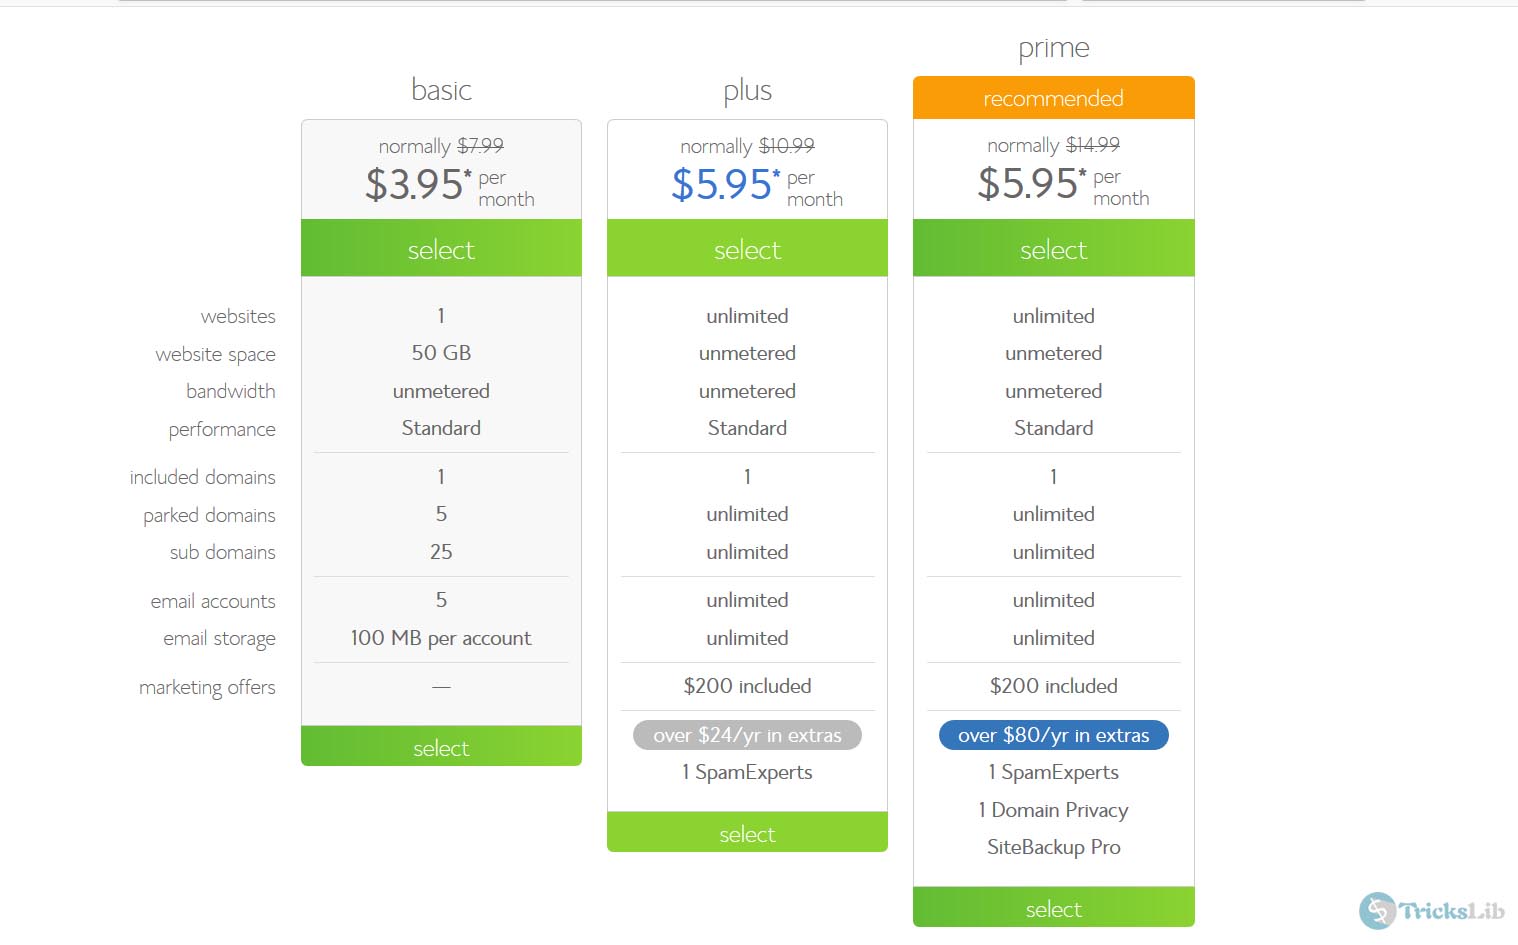
It will take you to page like above, these are hosting plans. Yes, these are not free you need to pay but note that these are cheapest plans if compared with other hosting services with these features.
Select your affordable plan and click ‘Select’ to go on.
The page like below will appear.

Now, if you already have a domain name, just enter the domain name in the second box and continue. If you don’t know about this, then understand that domain name is your website name. Like Google.com and Trickslib.com is a domain name. Usually, buying a new domain is quite costlier but in this hosting service, you will get a domain for free. So simply, choose an available domain name and click on ‘Next’.
After that, you can see the below page
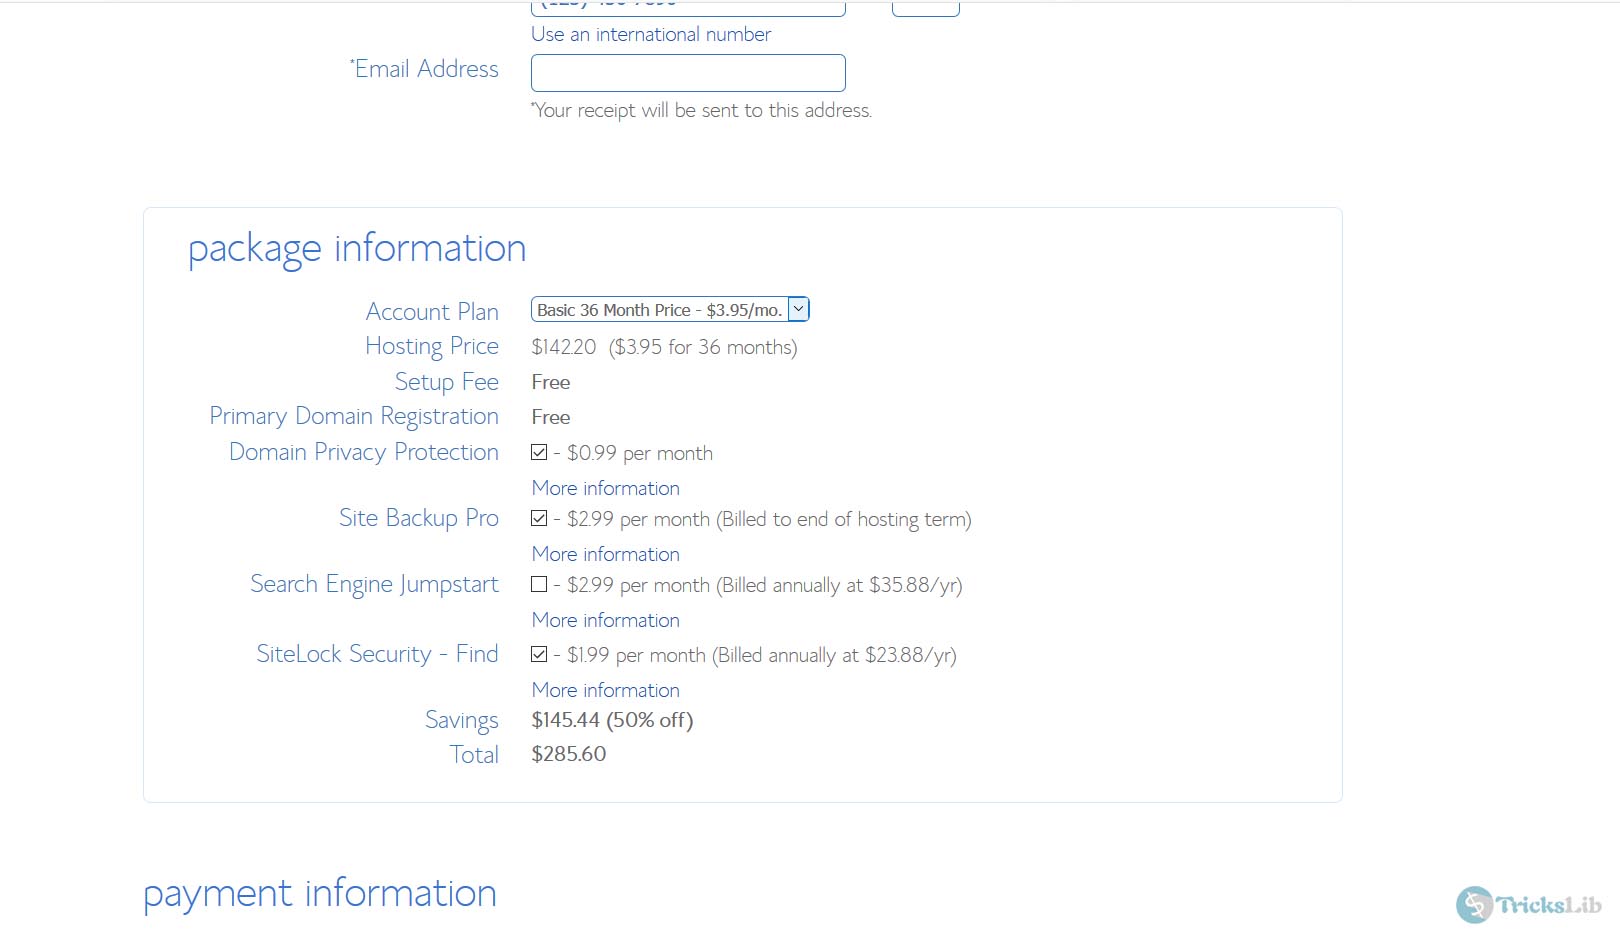
Everything you’ve selected will be edited already but still, you can make some changes here and pay.
Installing WordPress
After you make the payment, you’ve successfully bought hosting for your blog. Now, let’s jump to installing process.
Now, you’ll see your cPanel (means control panel from where your site will be controlled). There you will see many many icons, find this WordPress icon as highlighted below.
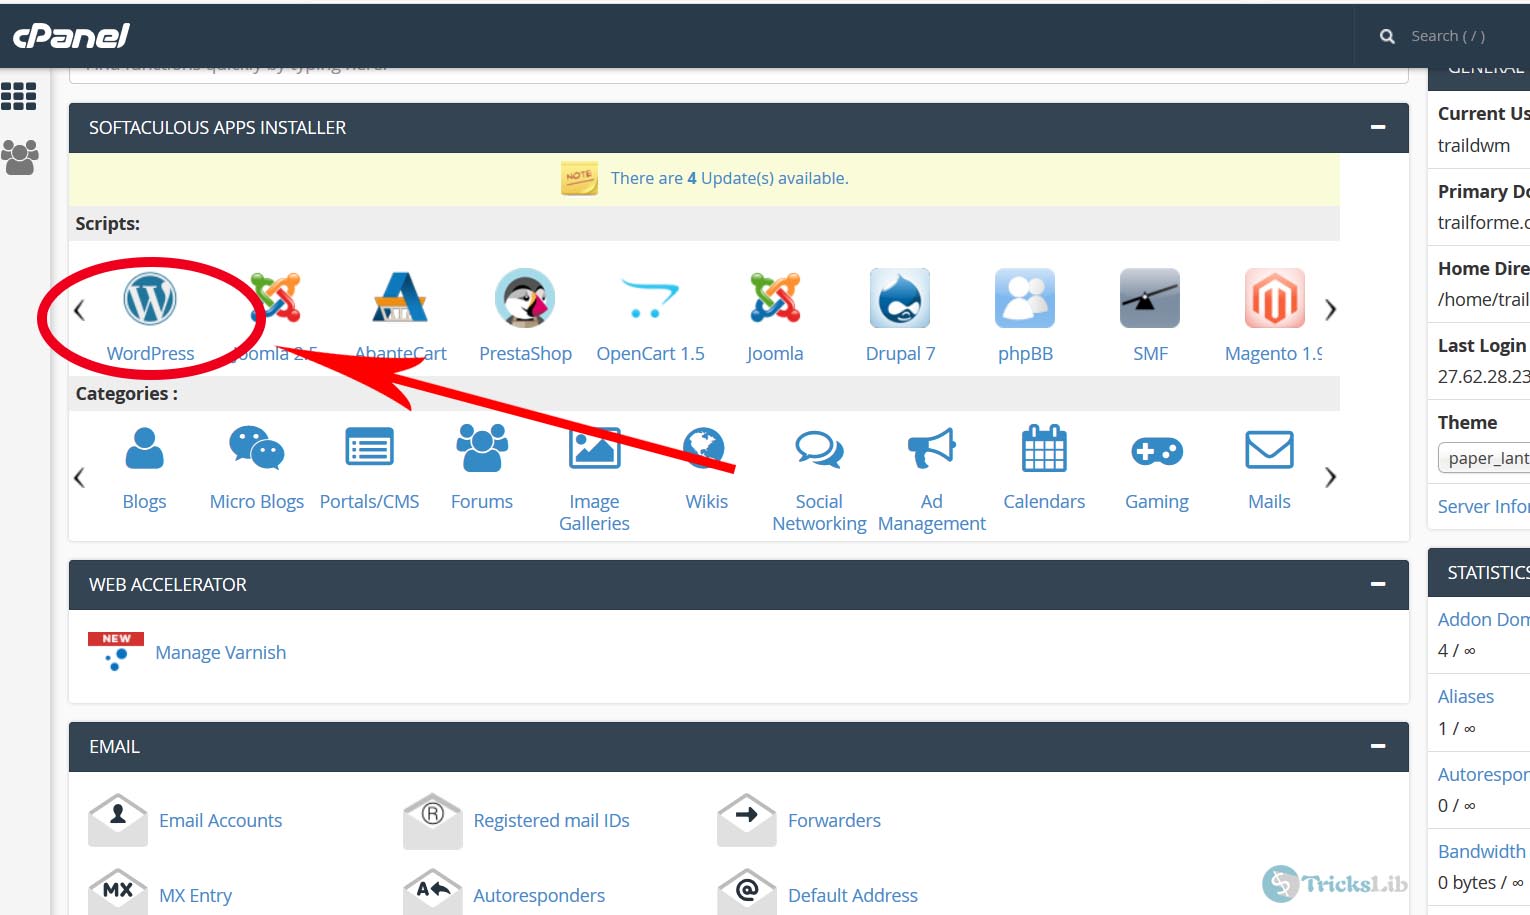
Click on that icon. And now the main and most important process, Installing WordPress.
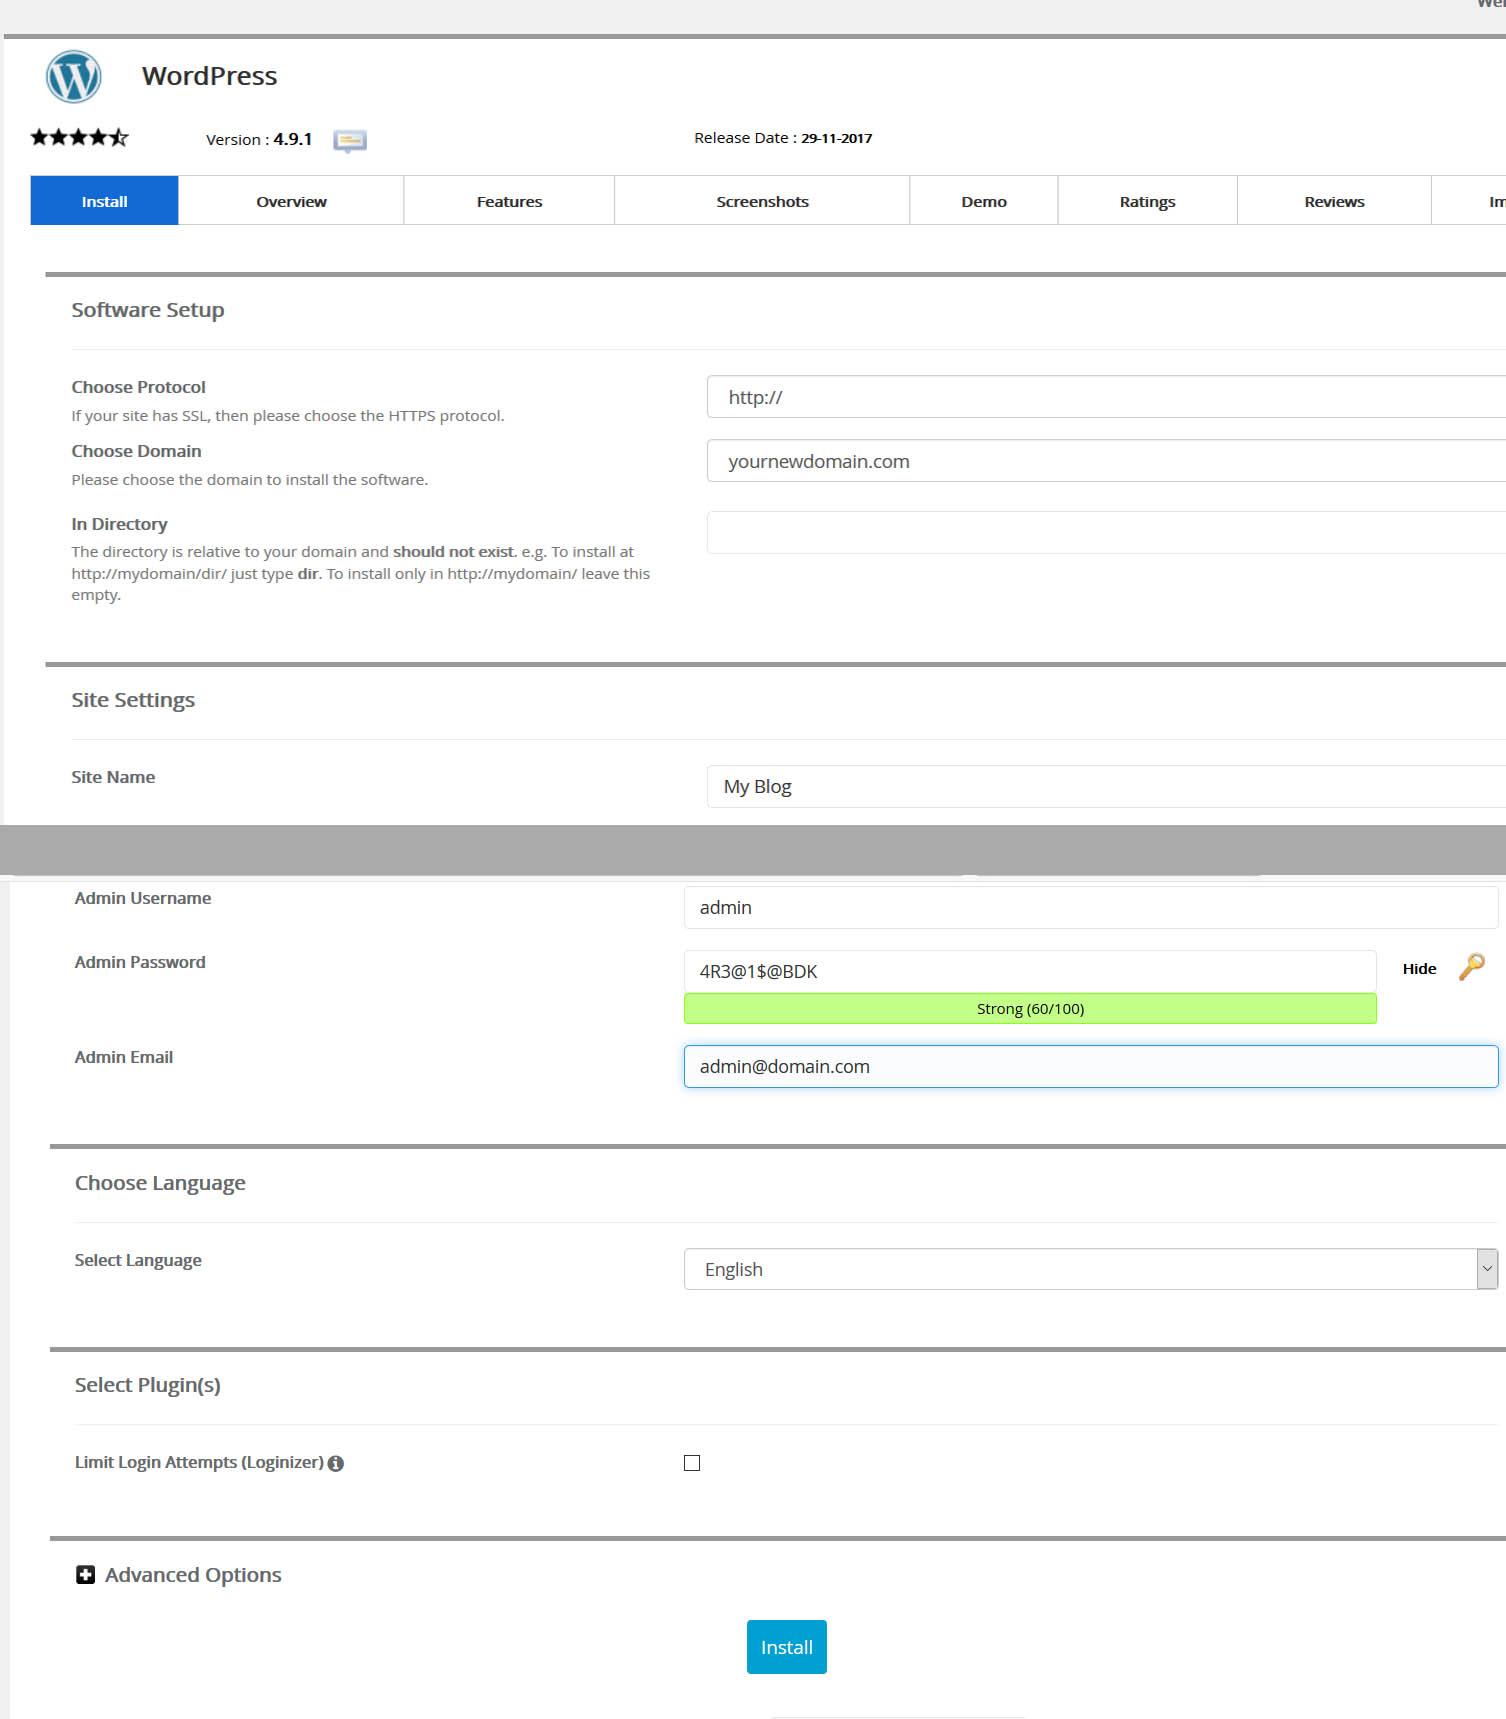
Fill these input boxes like this.
Choose Protocol: http://
Choose Domain: The domain you’ve chosen and bought
In Directory: Leave this empty
Site Name: Whatever you wish, note that this will be your blog’s title.
Admin Username: DO NOT USE Admin as username. This is just to show, choose a different username, later you can update your profile name.
Admin Password: It will fill the input box by default. You can either write down or remember the password or you can choose a strong password.
Now ignore other input boxes and just click on ‘Install’.
Congratulations..! Your new WordPress blog is ready. Now you can access your WordPress dashboard by URL,
- http://TheDomainYouChoosen.Com/wp-login.php
The login page will look like the below screenshot.
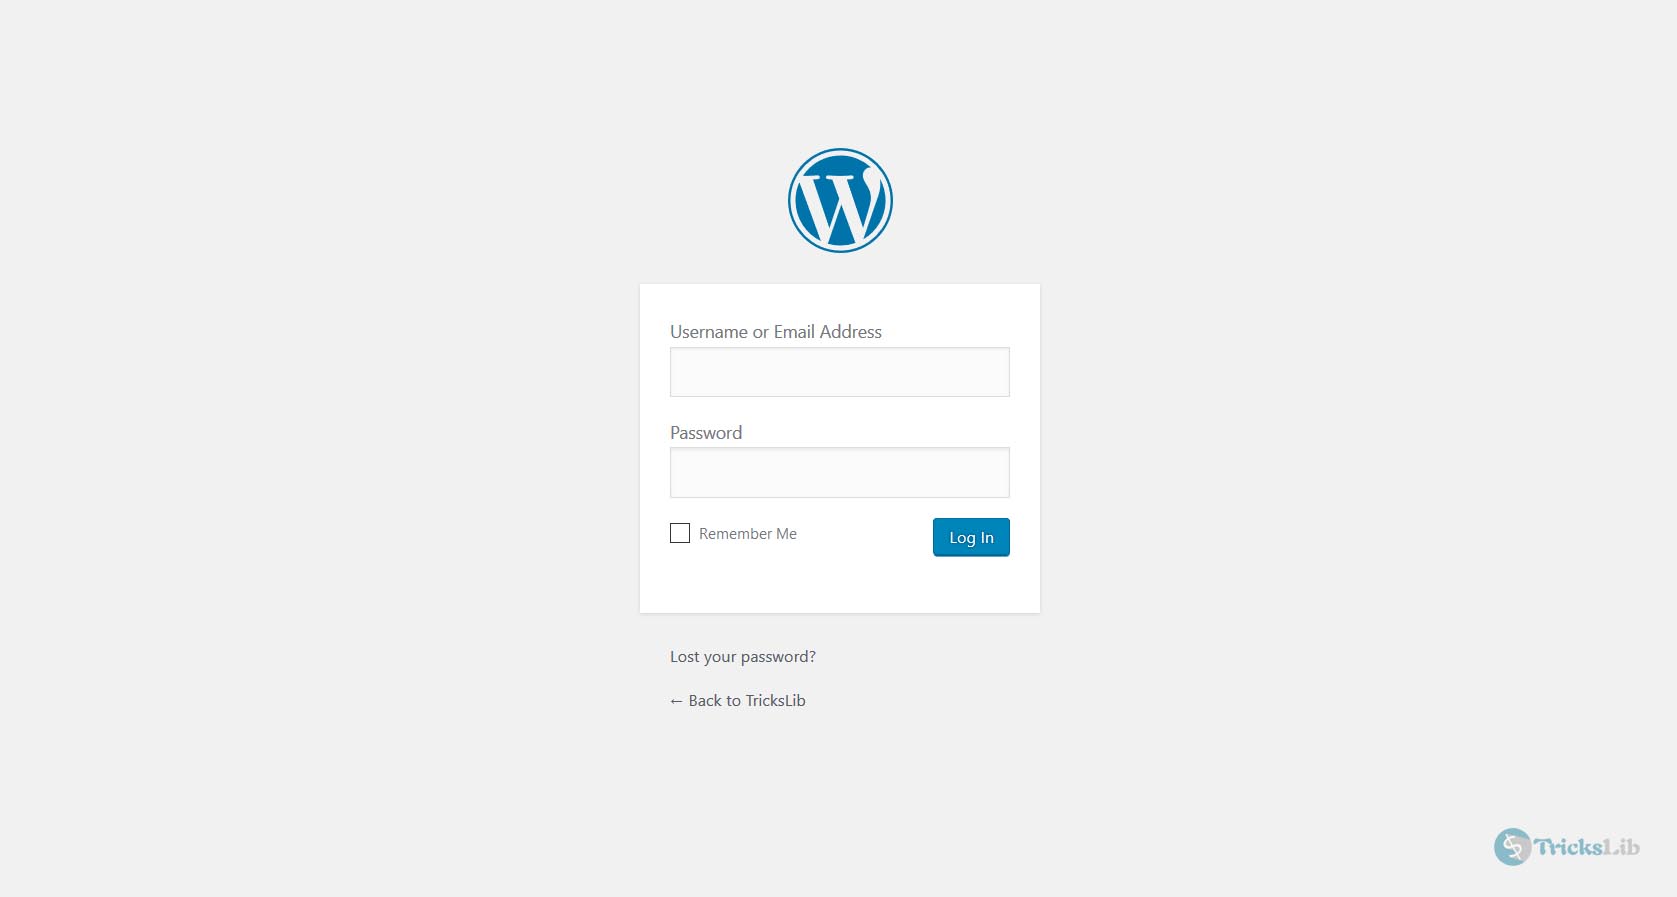
Fill there the username and password which you’ve chosen while installation.
Now, you’re ready to write and publish your posts and earn money on your blog.
If you’ve any questions relating to this post, do comment. I will come up with the reply.